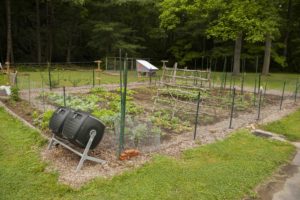
My vegetable garden on May 22, 2018. Things will look a lot different in a few short months.
I haven’t given an “official” tour of my garden since 2014 when we lived in VT. I went back to view the old blog post and my photos have been swallowed by cyberspace! Noooo! All that I was able to recover is this single photo showing just one of the 3 gardens that I cultivated in the back yard. I really loved that house, but our new beds are much bigger and I have far more space, which equates to far more food. I’d even go as far as to say that I’m slowly building my own personal microfarm here in Brevard, NC (#lifegoals).
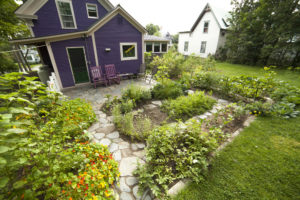
One of 3 beds that were used to grow annual vegetables at my house in VT.
My newest garden addition includes a made-with-love chicken coop that will be complete and inhabited within the next 2 weeks. I built the chicken house entirely from scrap wood, which was a feat in and of itself. I had to purchase the roofing, some hardware including hinges, and one pressure treated 2X4, but nothing else. The plywood was from our garage climbing wall in VT and most of the other scraps were already in our garage when we moved in. The last tenant before we bought the property in 2015 ran a cabinet making shop out of the garage, so there was quite an abundance of scrap wood… useless for most projects, but perfect for my chicken coop. The coop can hold a maximum of 12 chickens and the completely enclosed run can hold more (probably 15), but the house is the limiting factor. I’ll share more about this process once it’s finished and the gals have made their appearance. 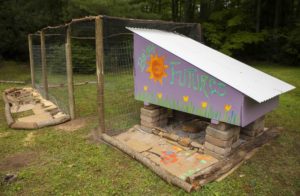
I’ve been experimenting with living mulches for the past 3 or 4 years and every year I get a bit more comfortable with purposefully growing what looks like “weeds” among my crops. I primarily use yellow clover since it can easily be kept low growing using a method called “chop and drop”. When it gets too tall, I chop it, drop it, and leave it alone. It’s pretty easy other than my type A personality feels a bit of anxiety watching the beautiful, bare soil slowly become overgrown with a weed-like appearance. The clover is spread throughout most of the garden and I’m also using an oat and pea mix in a few test spots this year. I use quite a bit of buckwheat as a cover crop, but it’s not suitable as a living mulch. More on that later.
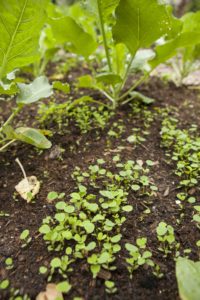
A living mulch, yellow clover, growing beneath my cauliflower plants.
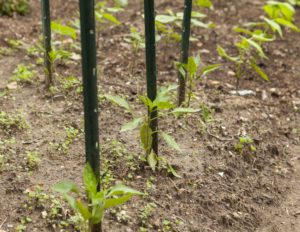
Yellow clover beneath my peppers. Although not pictured, a living mulch can be especially helpful to plant beneath tomatoes that need to be protected from blight.
I’ve done a better job at successional plantings this year meaning that I plant a small quantity of a crop at one time and then plant a second crop 4 – 8 weeks later. This results in an extension of the growing season for plants that may normally only have a 6 – 10 week window. Staggering these plantings means that I’m able to enjoy a freshly grown product for a longer season. I currently have 4 staggered plantings of lettuce, each is small, but I’m trying to guarantee that I don’t run out of lettuce at all this season. Well, except for when it gets ungodly hot and lettuce just starts to taste terrible.
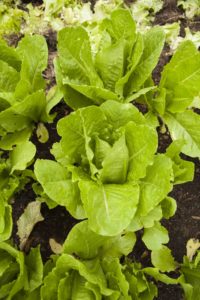
A handful of romaine lettuces that are nearly maturity. You can see the Black Seeded Simpson lettuce behind it that already bolted, was pulled, and left on the surface of the soil to decompose.
I lined three sides of the garden with additional edibles. One side is lined with a newly established herb bed that I created using a form of a Hugelkultur. I’m doing the same around the chicken coop with large blocks of wood that were sawn from felled trees from our yard. I’m not convinced I love this form of bed building, but I’m interested enough to keep trying it for some of my perennial beds just to see what happens. I’ll have to keep you updated on its long term effectiveness. I will say, however, that a handful of annuals that are planted in the herb bed appear to have iron deficiency. One of the considerations when building a bed in this manner is that your C:N ratio, an important factor in determining nutrient availability, will increase in the short term. This is less than desirable for your annual plants that require higher N availability. My guess is the minerals (like iron) can also temporarily be reduced. It’s beyond the scope of this post to discuss this at any length, but you can find tons of info on Hugelkultur and C and N cycling online.
The other sides of the garden are lined with berries: 6 tiny blueberry bushes that will have almost no yield this year, and a 50′ row of trellised raspberries and blackberries. The berry plants are still pretty small, but they’re filled with flowers this year meaning I’ll be getting berries! I’m sure I’ll quickly have massive berry patch that will require boat loads of pruning to keep it within the bounds I’ve set for its growth. A few of the blackberry plants died over the winter (I’m not sure what happened or why… this is just how it goes), so I plugged in a few winter squashes in the empty spaces. I don’t often plant winter squash due to the incredible amount of space that’s needed, but I figure a berry patch hole is a good spot for a massive plant that or may not be overtaken by squash borers. Those guys have DESTROYED my winter squash in the past, so I’m less than enthusiastic about committing space to large plants that don’t always do well.
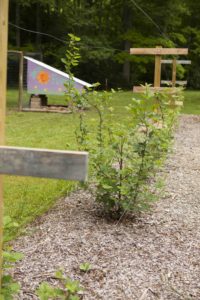
A side view of the trellised berries. If you look close you can see “Sweet Meat”, a winter squash variety plugged into any vacant spots.
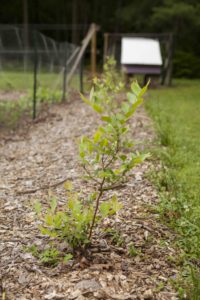
My 6 tiny blueberry bushes that were started as bare root plants last year.
The front yard houses my “micro-orchard” which includes 2 apples, 2 pears, 2 apricots, and 3 figs. I planted these as bare root trees and learned at an orchard management workshop not to prune the trees for a few years till the roots became more established. This is another situation that is very challenging for my a type A personality. My reaction is to tame the wildness of the trees, reign in the beauty, but I know that the roots need to be healthier before I start chopping away at the photosynthetic part of the plant. I have, however, seen plants that are pruned earlier and they too seem to be healthy. So, this is entirely up to you, but I’ve opted to let the wildness exists for 3 years before hacking away at the branches.
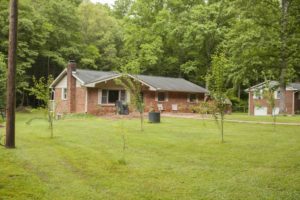
My unruly micro-orchard of apricots, pears, and apples.
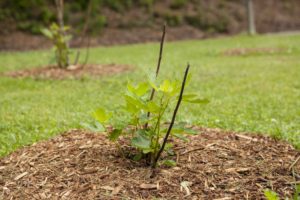
I’ve had a difficult time established figs, but all three seem to be coming out from the ground this year. I’m not sure what this means for fig production, but we’ll just wait and see. The figs will eventually be lined by a fence with grapes.
The more impressive blueberries reside along the perimeter of the front of the house. These were started as potted plants in 2016. I removed every single flower the first year they were planted in order to help the roots better establish themselves. We could’ve eaten the berries last year for the first time, but the squirrels beat us to it. There are 12 bushes out front and most of them are packed with blueberries. We’ll see who gets to them first… us or the squirrels. My hope is that the bushes will grow large enough over time that there will be enough to go around.
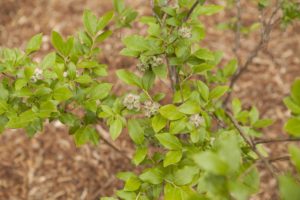
Just one of 12 larger blueberry bushes that resides out front of the house.
I have a small asparagus patch out front as well that doesn’t quite produce enough for my family. My plan is to eventually build 2 more of these beds along with a split rail fence lined with varying grapes, but as you can see, everything is a work in progress. Till then, my front yard will continue to look like a haphazardly placed accumulation of random plants. I just ask that you come back in 10 years to see the vision take shape.
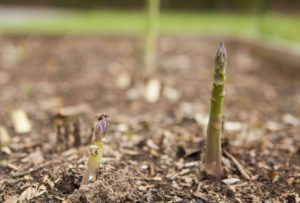
Asparagus emerging from the raised bed out front.
I’ll have to share more photos as the garden slowly takes shape and becomes the yard that I’ve always dreamed of. Thanks for taking the time to check it out!
Very informative post – thank you! I will search for your post on hugelkultur. I’m slowly planning on using an abundance of tree trimmings to make one, or several.
That’s great, Mia! I’ve only made flat versions of hugelkulturs (line the bottom of a bed with sticks, chunks of wood, and even wood chips) and it works okay. I’d be curious to know how one of the larger, mounded versions turns out. You’ll have to update me if you decide to do it! I haven’t actually posted anything specific to hugelkulturs, but maybe this can be a topic for a future post.